Hello, Happy Easter!
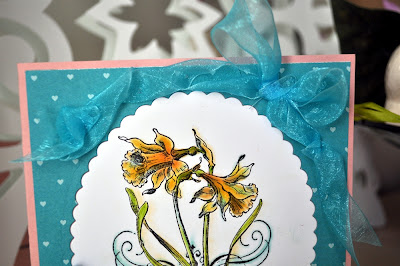
Here's my Easter Card this year - in easter-y colours of turquoise and yellows! The stamp is a recent purchase called Botanical Daffodil and its part of a floral line from Stampendous. I have it in the wood-mount style. I love the style and the script title " Trumpet Daffodil " which shows near the bottom.
It really does look like those botanical prints! There are a number of other flowers in the line, and hopefully I will be able to buy those too because I like the style, I like the size of the image and its wonderful stamp to colour - or use in lots of ways actually!

Couple of things to mention, I tried doing some "ribbonry" techniques - or really, flowers made from embroidery ribbon methods. I clipped 5 small strips of ribbon in grosgrain blue, folded and stitched them into a 5 petal flower shape. To that I stitched a sheer strip of ribbon and pulled it into a pansy shape - except I pulled it so tight, it sort of lost the pansy look, lol. There's always next time :)
Then I stitched the sheer ribbon into a trailing bow around the top of the card, and finished with a collection of 'old' brads I've had for ages! About time I used them :)


The card front is cut with Stampin' Up! newest OVAL FRAMELITS - so its a project of old and new for me! Which is sort of how my holidays are represented by new and old traditions so it seems fitting.

Hope you all have a lovely Easter.
Comments