Hey Everyone - I am finally back in crafting action! Actually I have been getting up in the wee early mornings and doing small things in transition to fall such as making my fall floral arrangements, putting away the summer dishes, digging up the seasonal clothes....you know....but I have also been making the odd craft project with all sorts of things! First off I have been having fun shopping!!! I am finding all sorts of craft items everywhere....from the usual places to bargain spots such as Winners and Dollar stores! My biggest score was finding some Spellbinders Nestabilities in Winners! Which has me scooting around to the various Winners to see if there are more lurking about, but I must of found them a wee late cuz I've only found 2 - but hey @ 7.99 that's two that cost a whole lot less! My other score was a $155 dollar soup pot for only $30 at Winners also! Gotta love Winners some days!
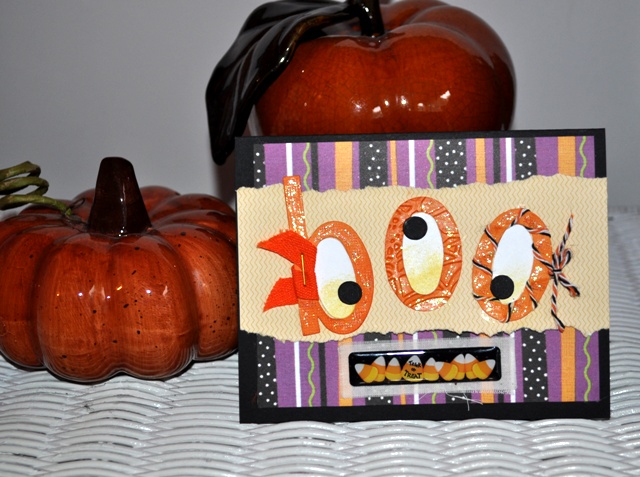
So, in honour of the 'bargain bin' - here is a card I made from Dollar Store materials - namely a Halloween section mini-album kit. I've used the decorative paper and the glossy stickers to make this BOO card. A very simple card - just have fun playing with the alpha letters B and O to create " BOO "....easy peasy!

To make the BOO eyes - simply cut the same letters out in white cardstock and use the negative space [the parts you normally toss away] which in this case are handy oval shaped! I punched some small black circles and glued them in a whimsical fashion to complete the goofy eyeball look!
Even better - than simply die-cutting your letters - emboss them too! Each letter was embossed with a spider web embossing folder and glittered with stickles, gotta have that glitter!
And have fun decorating with embellishments!
Earlier this year I bought the orange/black twine from Your Next Stamp and wound it around one of the O's - and simply used a stapler to attach a scrap of ribbon to the B. Of course Basic Black cardstock from Stampin' Up! helps to make the colours pop! boo-boo bop! there you have it!!!!

My next project is going to be using these leaves! I am cutting out leaves in various colours BUT I am also cutting some in white cardstock which I then sponge colours all over in a pleasing fashion. Just don't sponge the colours over top of each other to avoid a muddy mess look.
Then afterwards, I run these through different embossing folders and once more, I stickle them with glitter!

Even just as they are, they'd be fun to sprinkle around the Thanksgiving table! But I will show you what I did with them very very soon!
Cha for now!
xxxx
Comments